How to Tile a Bathroom: A Step-by-Step Guide for Beginners
Tiling a bathroom is an excellent way to enhance its aesthetics and functionality. Whether you’re a DIY enthusiast or a beginner looking to improve your skills, this guide will walk you through every step of the process. From choosing the right tiles to applying grout, we cover everything to ensure a professional finish.
Why Tiling a Bathroom is Essential
A well-tiled bathroom not only improves the room’s durability and hygiene but also adds value to your home. Properly installed tiles resist moisture, prevent mold growth, and create a visually appealing space.
Tools and Materials Needed
Before you start, gather the essential tools and materials:
- Tiles (ceramic, porcelain, or natural stone)
- Tile adhesive
- Tile spacers
- Notched trowel
- Grout and grout float
- Tile cutter or wet saw
- Measuring tape and level
- Pencil or chalk line
- Bucket and sponge
- Safety glasses and gloves
Step-by-Step Guide to Tiling a Bathroom
Step 1: Plan Your Layout
Before applying any tiles, measure your bathroom space and plan the layout. Consider starting from the center of the wall or floor for a symmetrical design. Use a chalk line or pencil to mark guidelines.
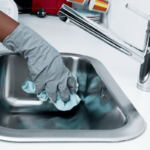
Step 2: Prepare the Surface
Ensure the wall or floor is clean, dry, and smooth. If necessary, apply a waterproofing membrane to protect against moisture damage.
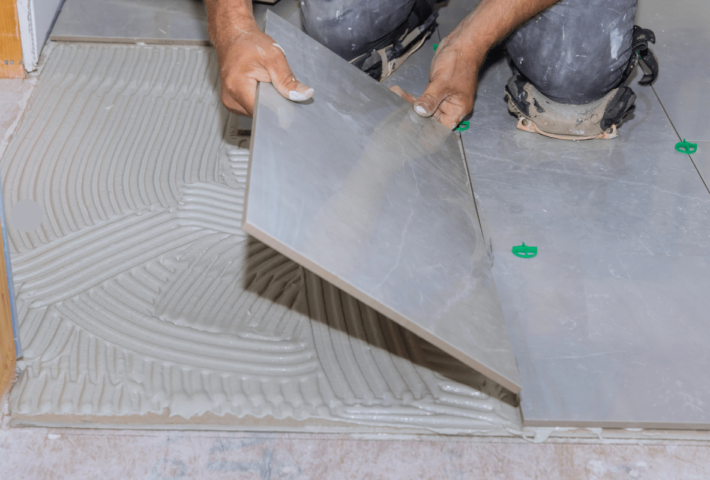
Step 3: Apply Tile Adhesive
Use a notched trowel to spread tile adhesive on a small section of the surface. Hold the trowel at a 45-degree angle to create even ridges for a strong bond.
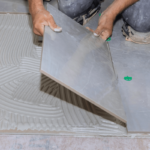
Step 4: Place the Tiles
Carefully press each tile into place, using tile spacers to maintain even gaps. Check with a level to ensure they are straight and adjust as needed.
Step 5: Cut Tiles for Edges and Corners
Use a tile cutter or wet saw to trim tiles that don’t fit along the edges or around fixtures. Smooth rough edges with sandpaper or a rubbing stone.
Step 6: Let the Adhesive Dry
Allow the adhesive to cure for at least 24 hours before applying grout. Avoid walking on floor tiles or disturbing wall tiles during this period.
Step 7: Apply Grout
Remove tile spacers and use a grout float to spread grout over the tiles, pressing it into the gaps. Wipe away excess grout with a damp sponge before it dries.
Step 8: Seal the Grout
Once the grout is dry, apply a grout sealer to prevent moisture absorption and staining. This step helps prolong the life of your tiled surface.
Step 9: Clean and Finish
Wipe the tiles with a clean, damp cloth to remove any remaining grout haze. Buff with a dry cloth for a polished finish.
Common Mistakes to Avoid
- Not preparing the surface properly – Uneven surfaces lead to loose tiles.
- Using the wrong adhesive – Ensure compatibility with your tile type.
- Skipping tile spacers – This results in uneven gaps and misalignment.
- Not sealing grout – Unsealed grout absorbs water and stains over time.
FAQs
Q1: Can I tile over existing bathroom tiles?
Yes, but the surface must be clean, dry, and free of damage. Use a suitable primer before applying adhesive.
Q2: How long does it take to tile a bathroom?
Depending on the size and complexity, it can take 2-3 days, including drying time.
Q3: What type of tile is best for a bathroom?
Porcelain and ceramic tiles are the most popular due to their durability and water resistance.
Q4: How do I clean and maintain bathroom tiles?
Regularly clean with a mild detergent and avoid abrasive cleaners that may damage the surface.
Conclusion
Tiling a bathroom may seem challenging, but with the right tools, materials, and techniques, you can achieve a professional finish. Whether you’re refreshing an old bathroom or installing tiles for the first time, following these steps will help you create a stylish, durable, and waterproof surface.
Need expert advice on bathroom tiling? Contact us at Crown Quotes for professional tiling services in London. Let’s transform your bathroom today!
Write a comment
Featured News