How to Clean Grout Fast: A Step-by-Step Guide for Busy Homeowners
Grout is the essential filler between tiles, keeping them secure while enhancing the overall look of your surfaces. However, it can accumulate dirt, stains, and moisture over time, leaving it dull and unattractive. Learning effective grout cleaning techniques not only revitalizes its appearance but also ensures the longevity of your tiles. This comprehensive guide will provide practical methods, helpful tips, and preventive measures to keep your grout looking fresh.
What is Grout?
Grout is a porous material typically made from cement, used to fill the spaces between tiles. Its spongy texture makes it prone to trapping dirt, grime, and moisture, leading to discoloration and stains.
Why Does Grout Get Dirty?
- Moisture Accumulation: Bathrooms and kitchens often have humid conditions that encourage mold and mildew.
- High Traffic: Grout on floors is exposed to dirt, debris, and heavy foot traffic, causing wear and discoloration.
- Improper Maintenance: Using unsuitable cleaning agents or neglecting regular care can lead to buildup.
- Stains from Spills: Liquids and food left on tiled surfaces can seep into the grout, creating stubborn stains.
Essential Tools and Supplies for Cleaning Grout
Gathering the right tools can simplify the cleaning process and enhance your results. Here’s what you’ll need:
- Grout Brush or Soft-Bristled Brush: To gently scrub away dirt without causing damage.
- Microfiber Cloths: For wiping down surfaces and drying grout effectively.
- Spray Bottle: Designed to ensure even application of cleaning solutions, making your cleaning tasks more efficient and effective.
- Vacuum or Broom: To clear away loose dirt and debris beforehand.
- Protective Gloves: To protect your skin when handling strong cleaning agents.
- Cleaning Solutions: These can range from commercial grout cleaners to homemade options like baking soda and vinegar.
Step-by-Step Instructions for Cleaning Grout
Step 1: Prepare the Surface
Clean or vacuum the space to eliminate any loose dirt and debris. This prevents grime from spreading during cleaning.
Step 2: Choose and Apply a Cleaning Solution
Select a cleaner based on the severity of the dirt:
- For light stains, create a gentle solution by combining warm water with a few drops of mild dish soap.
- For deeper stains, opt for a baking soda and water paste or a store-bought grout cleaner.
Spread the cleaner evenly along the grout lines, making sure every area is well-covered. Let it sit for 5–10 minutes to loosen dirt and grime.
Step 3: Scrub the Grout Lines
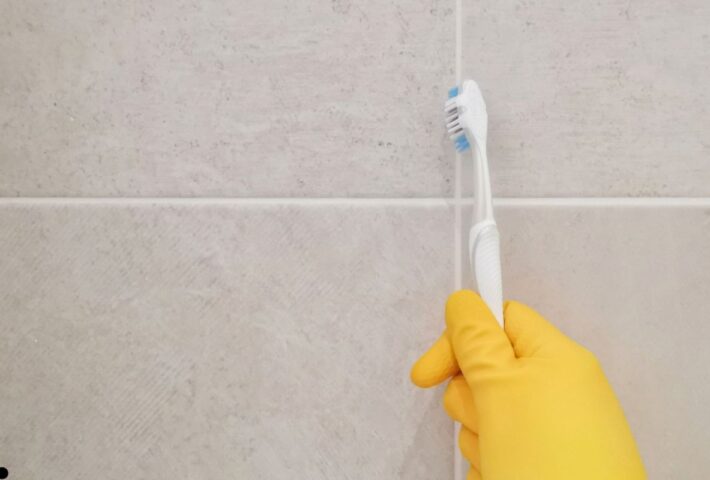
Using a grout brush or soft-bristled toothbrush, scrub the grout in circular motions. Avoid metal brushes, as they may damage the grout.
Step 4: Rinse Thoroughly
Rinse the area with clean, warm water to remove cleaning residues. Follow up with a damp microfiber cloth to wipe away any remaining solution.
Step 5: Ensure the Area is Dry
Dry the cleaned surface using a microfiber cloth or let it air dry completely. Effective drying is essential to avoid the development of mold and mildew.
Specialized Grout Cleaning Techniques
Cleaning Bathroom Grout
Bathrooms often have high humidity, leading to moldy grout. Use a baking soda and hydrogen peroxide mixture for effective results.
Refreshing Shower Grout
A blend of baking soda and vinegar is excellent for tackling soap scum and grime in shower grout. Apply, let fizz, scrub, and rinse.
Restoring Tile Grout
Use warm water mixed with mild detergent to clean grout between tiles. Scrub gently and rinse thoroughly.
Removing Mold from Grout
For moldy grout, use a commercial mold remover or a mix of vinegar and baking soda. Ensure proper ventilation while cleaning.
Brightening White Grout
White grout can be restored with a baking soda and lemon juice paste. Scrub carefully and rinse for a sparkling finish.
Waiting Period for Fresh Grout
Allow newly installed grout to cure for at least 24–72 hours before attempting to clean it. This ensures durability and prevents damage.
Fixing Blackened Grout
Grout that has turned black usually has deep-seated mold or dirt. A powerful grout cleaner or a baking soda and vinegar paste can restore its appearance.
DIY Grout Cleaning Solutions
DIY cleaning solutions can work just as well as store-bought products.
1. Baking Soda and Vinegar
- Mix water and baking soda until you achieve a thick, spreadable paste.
- Apply to grout lines, then spray vinegar over the top.
- Let it fizz, scrub, and rinse with warm water.
2. Hydrogen Peroxide and Baking Soda
- Mix hydrogen peroxide and baking soda in equal amounts.
- Spread onto stains, let sit for 10 minutes, and scrub gently.
3. Lemon Juice and Baking Soda
- Mix lemon juice with baking soda to form a natural whitening paste.
- Apply, scrub lightly, and rinse thoroughly.
Preventive Tips for Keeping Grout Clean
Maintain clean grout with these simple habits:
- Apply Grout Sealer: This protective layer minimizes moisture absorption and stains.
- Wipe Spills Immediately: Prevent liquids from seeping into grout.
- Regular Cleaning: Sweep and mop tiles frequently to prevent dirt buildup.
- Use a Squeegee: Remove water from tiled areas after showers to reduce mold growth.
- Stick to Safe Cleaners: Avoid harsh chemicals that can erode grout.
When to Call in Professionals
If DIY methods fail to remove tough stains or restore grout, consider hiring professional cleaners. Their expertise and specialized tools can rejuvenate your grout without causing damage.
Conclusion
Maintaining clean grout is vital for preserving the beauty and functionality of your tiled surfaces. By following these practical cleaning techniques and preventive tips, you can ensure your grout remains in top condition for years to come.
For expert grout cleaning services and home improvement solutions, visit Crown Quotes. Rely on experts to take care of your cleaning, letting you relax in a spotless and sparkling home!


